Maybe you also have come across this recurring scenario. Managers should be enabled to add positions in SuccessFactors and you want a workflow to trigger. Accordingly, the workflow will require input from HR to approve this new position. This article will show you how to create this workflow for a new position and additional requirements.
1. Prerequisites for the workflow and the position object
The first requirement for this solution is to enable Position Management in Provisioning. Ideally, this and matrix management has been implemented already. Yet, if not we’ll have to do the following two steps:
- The Matrix Relationship picklist has to be created with all roles that we require in our system (guide here). We can choose any role for our workflow, but for this example, we’ll add the „HR Manager“.
- The Picklist has to be linked in the Position Object. Also, the PositionMatrixRelationship has to be set as editable.
It will also be used to identify the correct manager of the new position to be picked by the workflow.

Another requirement we have is regarding the Position Object. It has to be configured, as to enable us to later assign the “create” permission separately. Thus, we open the position object in Configure Object Definitions. There, we scroll down to Security and select “Yes” for Secured and in the permission category Miscellaneous Permissions.
Also, we want the permissions to respect the target criteria. Therefore, we set the option Create Respects Target Criteria to “Yes” as well.
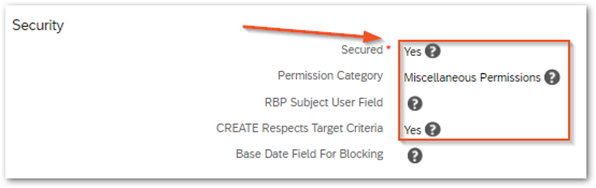
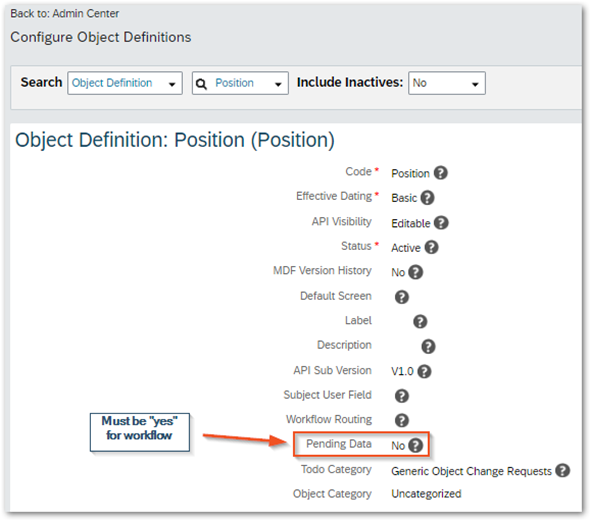
Additionally, it is very important to set the Pending Data option to “Yes”. This will allow a newly created position to be in a pending state. In this state, it will be awaiting approval of the workflow for a new position. Once the workflow has been approved, the position will be made available in the system.
The implementation guide for position management can be found here.
2. Workflow for a new position: The Setup
Setting up Permission roles
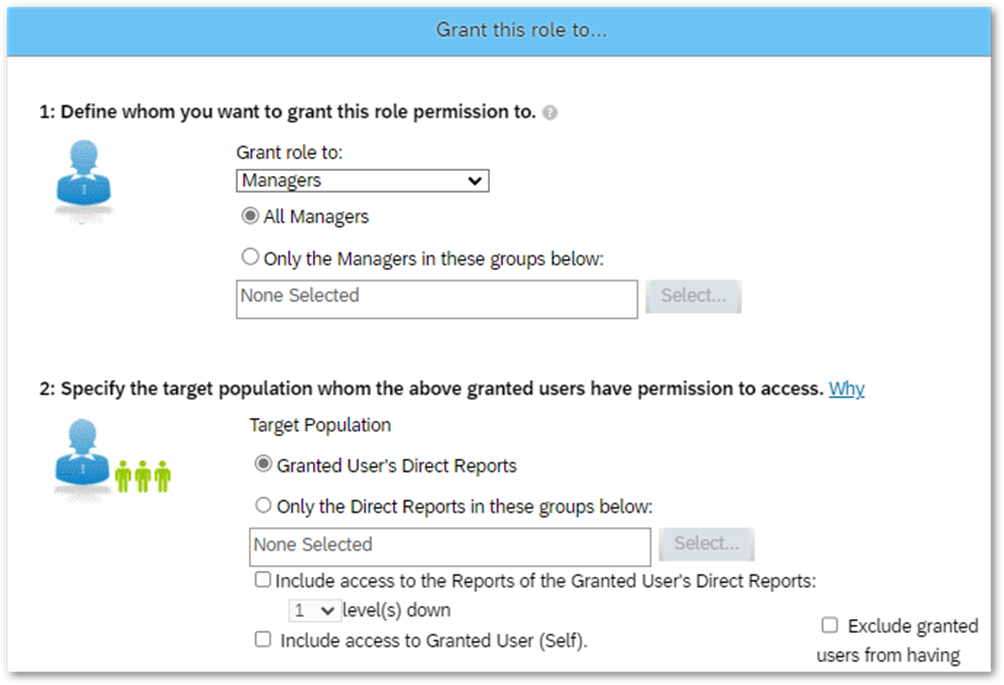
In our setup we want managers to be able to view positions and their history. This permission should be independent of our workflow and not only apply to the managers‘ team. Hence, we will need two separate permission roles with different target groups. So, one role is to see all positions and the history, and one role is to create positions below the user’s position.
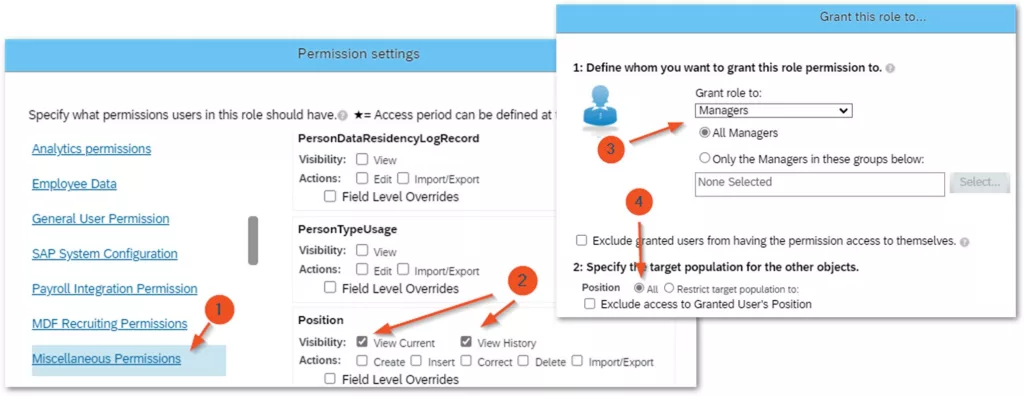
The first permission role will be for viewing the position and the history, so we find the required permissions under Miscellaneous Permissions > Position > Visibility and tick “View Current” and “View History”. As the target for this role, we choose all positions. Then we assign the role to all Managers.
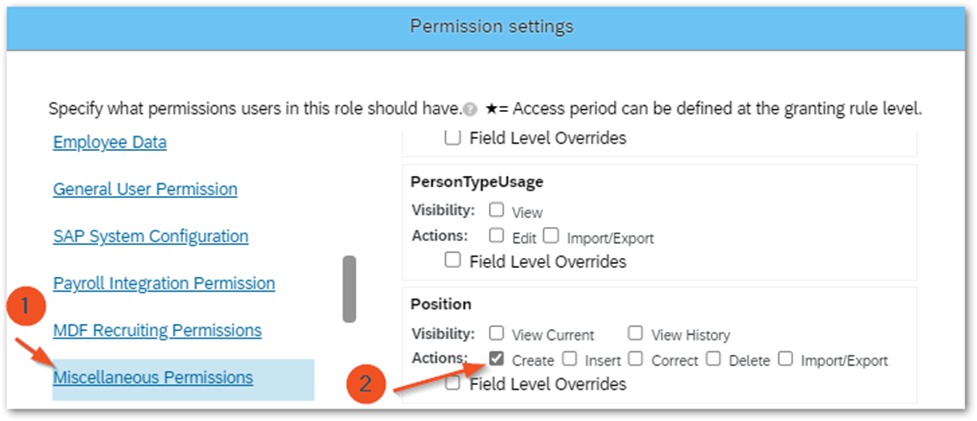
Next, we will set up the permission role to enable Managers to create a new position via the org chart. For this role, we tick the “create” permission under Miscellaneous Permissions > Position > Actions and assign it to all Managers.
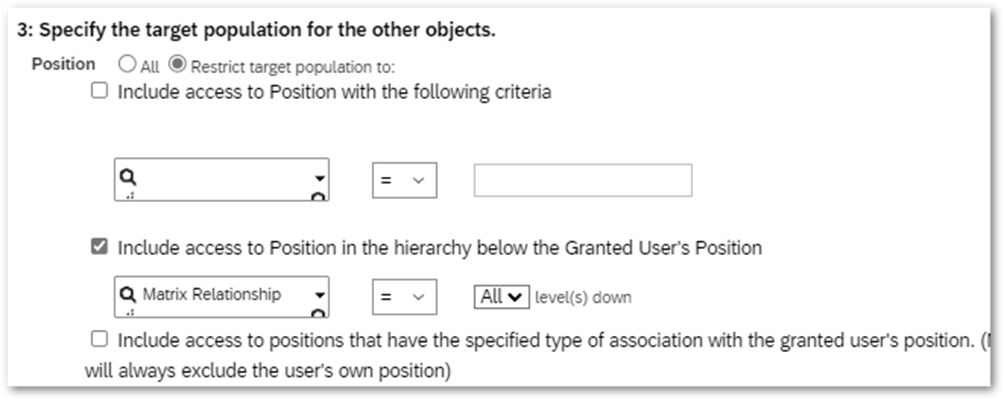
Additionally, we define the target population by restricting it to the positions below the Managers. Therefore, we choose Restrict target population to, tick Include access to Position in the hierarchy below the Granted User’s Position and choose Matrix Relationship = All.
Setting up Workflow
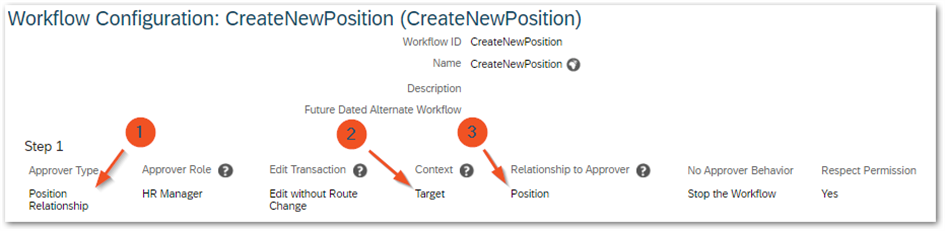
Secondly, we need to set up the approval workflow as well. Accordingly, this workflow should always trigger when the manager is creating a position below their own. Here, the following settings are to be made for this:
- Approver Type: Position Relationship
- Approver role: HR Manager
- Context: Target
- Relationship Approver: Position
On a side note: we could also select the approvers not based on position relationship but on other criteria. Respectively, workflow groups or dynamic roles can be used to refer to the approver as well.
Setting up Business Rule
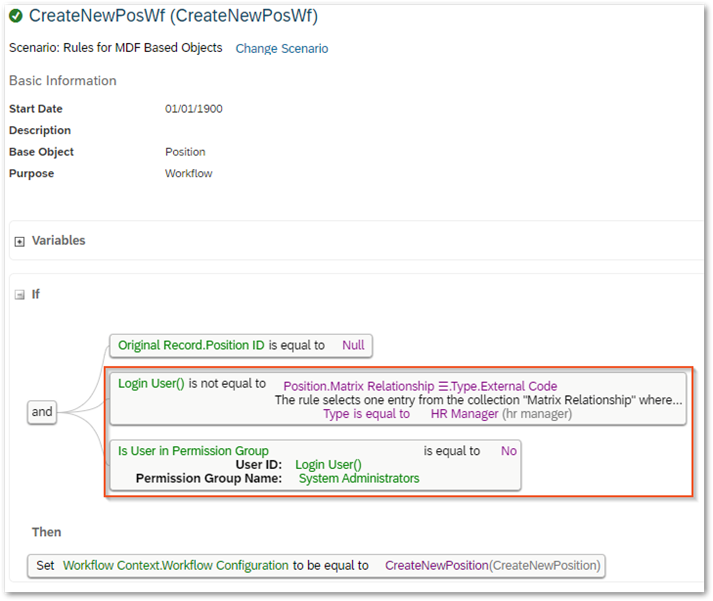
Thirdly, we would like to create a Business Rule that will trigger onSave if a position is newly created. For that, we set up the following rule and reference to our workflow in the then logic:
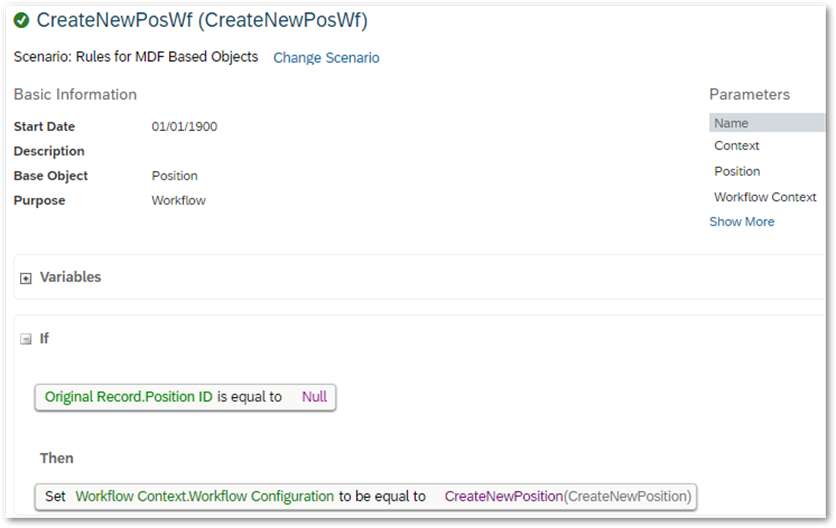
The above rule will always trigger when a rule is created through the org chart when accessing a position and choosing Add Lower Level Position. As long as we grant the „create“ permission only to Managers this rule would suffice. Yet, if we give it to other groups too, the workflow will trigger as well. In this case, we must assess whether this is a wanted reaction. In case not, it is possible to filter the trigger by inserting an and condition to the If. Below, we can see an example on how to restrict the trigger. Here, rule will only trigger if two requirements are met:
- The login user is not an HR Manager
- The user is not in the permission group “System Administrators”
Hence, we would disable this workflow for HR Managers and System Administrators. That is, because we’d like to grant them permission to create new positions as well.
Position Object
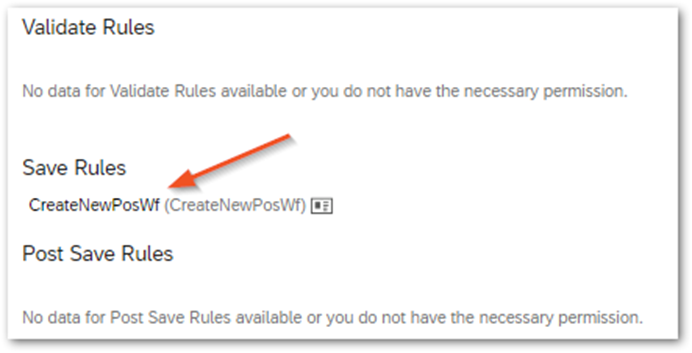
Lastly, we want the business rule to trigger when a new position is created/saved. Accordingly, we need to attach it to the Position Object under Configure Object Definitions. Please make sure to place it in the Save Rules category.
3. Validation through testing
For testing in our testing instance, we select the user Kelly Branfield as our test case. She and her team have their matrix position relationships implemented, which saves us from implementing it manually. Also, note that for Kelly Branfield to see the Position Org Chart she has to have permission to access it. Likewise, when creating a new position make sure you are proxied as your test manager. Additionally, make sure you are using the option in Branfields position, not the “add position” of the org chart:
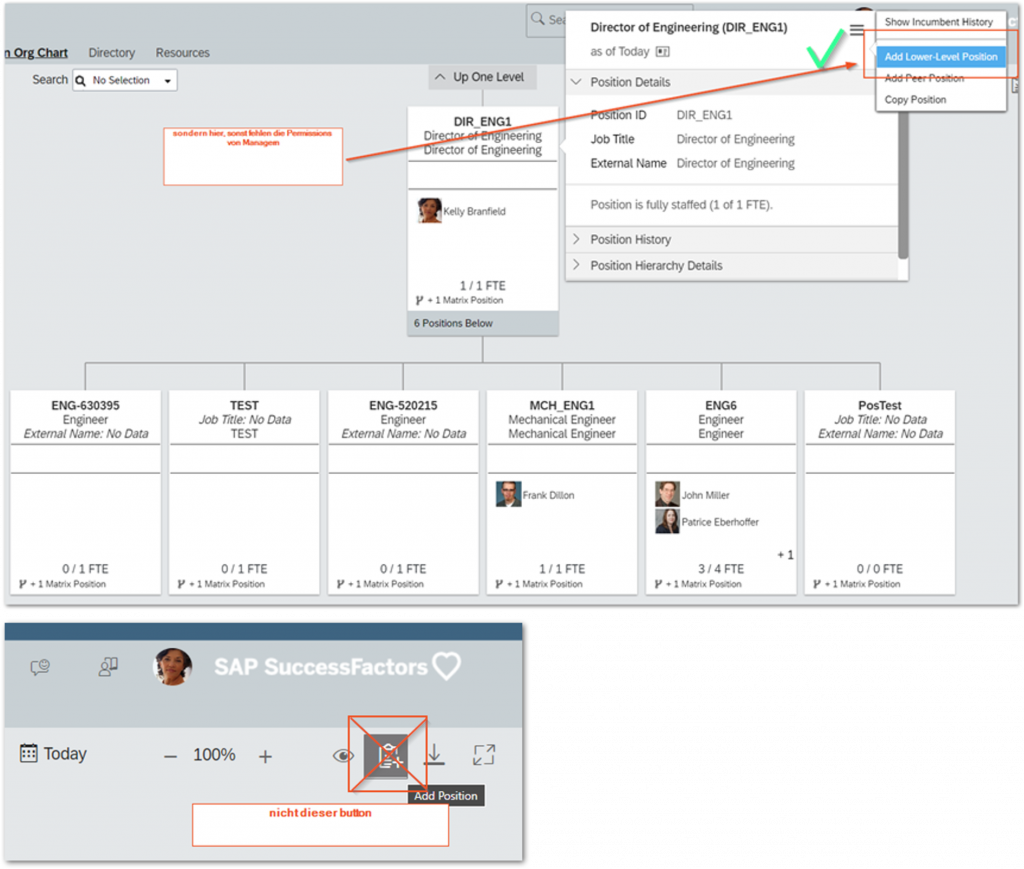
Above option to create positions via org chart could also be disabled for managers if required.
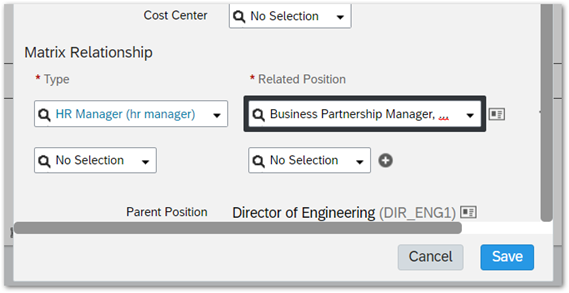
Now, we create a new position, validating first that the parent position is filled. Additionally, we select the HR Manager under Matrix Relationship.
If everything was set up correctly, we now should have a workflow appear after saving the position. 🎉
If you are interested in more content like this have a look at our other blog posts here.
Also, if you are missing a topic, don’t hesitate to contact us!
Keine Kommentare